Yii是一个开源、高性能、灵活、高效且安全的PHP框架,可用于快速构建现代Web应用程序,它是一个通用的全堆栈Web编程框架,用于以面向对象的方式编写代码,并提供许多经过验证和随时可用的功能。
此外,Yii带有许多合理的默认值和内置工具,可帮助用户编写可靠且安全的代码。以下是Yii主要的一些特性:
- 一个纯粹基于OOP的框架。
- 基于组件的架构。
- 实现MVC(模型-视图-控制器)架构模式。
- 支持关系数据库和NoSQL数据库的查询构建器和ActiveRecord。
- 多层缓存支持。
- RESTful API开发支持。
- 具有极强的可扩展性,允许用户直接从核心定制或替换任何代码段。此外,用户可以使用或开发可再分发的扩展。
目前Yii 2.0是最新一代的框架(在编辑本文时),它需要PHP 5.4.0或更高版本支持,不过在最新PHP 8版本上运行效果最佳。Yii 2.0支持一些最新的Web技术和协议,包括Composer、PSR、Namespaces、Traits等等。
作为一个通用的Web开发框架及其重要特性,Yii可用于开发几乎任何类型的Web应用程序,从用户/管理门户、论坛和内容管理系统 (CMS),到电子商务项目、RESTful Web服务,以及更多的大规模网站等。
在本文中,小编将简单介绍如何在基于RHEL的发行版上安装Yii PHP框架以开始使用Yii开发PHP应用程序。安装条件如下:
- RHEL和基于RHEL的发行版(如CentOS Stream、Rocky Linux和AlmaLinux)的运行实例。
- PHP 5.4.0或更高版本的LAMP或LEMP堆栈。
- A Composer – PHP的应用程序级包管理器。
安装LAMP或LEMP堆栈环境
Yii需要PHP 5.4或更高版本,并在服务器上安装Apache或Nginx网络服务器,命令如下:
-------- 安装LAMP堆栈 --------
# yum install httpd php php-mysqlnd php-pdo php-gd php-mbstring zip git
-------- 安装LEMP堆栈 --------
stall nginx php php-mysqlnd php-pdo php-gd php-mbstring zip git
安装之后,可以启动并启用Apache或Nginx Web服务器。
# systemctl start httpd
# systemctl enable httpd
或者
# systemctl start nginx
# systemctl enable nginx
使用Composer安装Yii
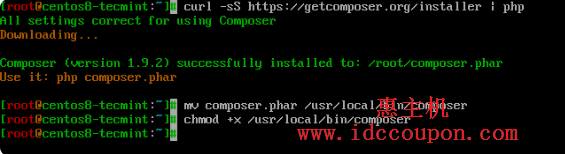
有多种安装Yii的方法,但这里推荐安装Yii的方法是使用Composer包管理器,因为它允许用户使用单个命令更新Yii,还可以让用户安装新的扩展。如果尚未在服务器上安装Composer,则可以通过运行以下命令来安装它。
# curl -sS https://getcomposer.org/installer | php
# mv composer.phar /usr/local/bin/composer
# chmod +x /usr/local/bin/composer
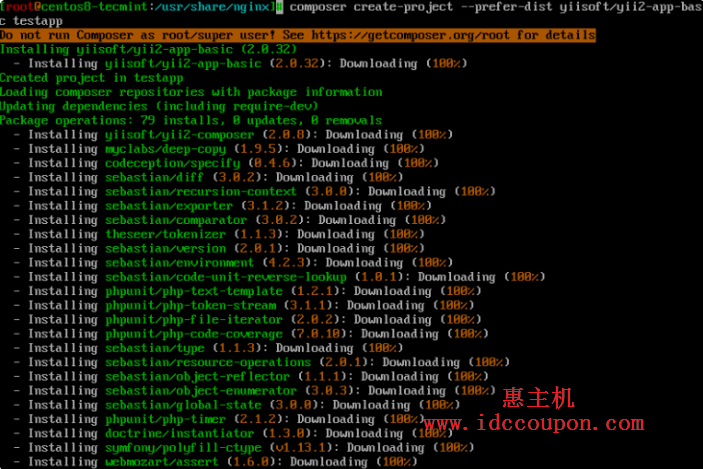
安装Composer后,可以在名为testappApache或NginxWeb可访问目录下安装Yii应用程序模板的最新稳定版本。当然,如果需要,也可以选择其它目录名。
# cd /var/www/html/  [Apache根目录]
或者
# cd /usr/share/nginx/html/ [Nginx根目录]
# composer create-project --prefer-dist yiisoft/yii2-app-basic testapp
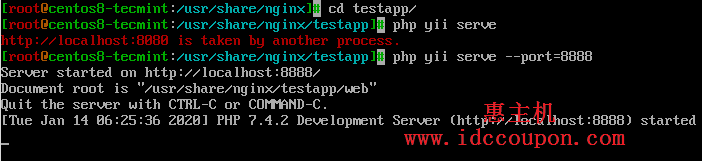
安装完成后,配置Web服务器(将在下文介绍)或通过在testapp项目的根目录中执行以下命令来使用集成的PHP Web服务器。
# cd testapp
# php yii serve
注意:默认情况下,HTTP服务器将监听端口8080。但是,如果该端口已被使用,可以通过添加--port参数来使用不同的端口,如下所示:
# php yii serve --port=8888
现在,打开浏览器并输入以下URL访问已安装的Yii应用程序。
http://localhost:8888
为Yii配置Web服务器
在生产服务器上面,你可能希望配置网络服务器以通过URLwww.idccoupon.com/index.php为Yii web应用程序提供服务,而不是www.idccoupon.com/basic/testapp/index.php。在这种情况下,您必须将 Web 服务器文档根目录指向该testapp/web目录。
推荐的Nginx 配置
创建一个名为/etc/nginx/conf.d/testapp.conf的配置文件。
# vi /etc/nginx/conf.d/testapp.conf
将以下配置复制并粘贴到其中。请记住替换tecmintapp.lan为你的域名和/usr/share/nginx/html/testapp/web应用程序文件所在的实际路径。
server {
    charset utf-8;
    client_max_body_size 128M;

    listen 80; ## listen for ipv4
    #listen [::]:80 default_server ipv6only=on; ## listen for ipv6

    server_name tecmintapp.lan;
    root        /usr/share/nginx/html/testapp/web;
    index       index.php;

    access_log  /var/log/nginx/access.log;
    error_log   /var/log/nginx/error.log;

    location / {
        # Redirect everything that isn't a real file to index.php
        try_files $uri $uri/ /index.php$is_args$args;
    }

    # uncomment to avoid processing of calls to non-existing static files by Yii
    #location ~ \.(js|css|png|jpg|gif|swf|ico|pdf|mov|fla|zip|rar)$ {
    #    try_files $uri =404;
    #}
    #error_page 404 /404.html;

    # deny accessing php files for the /assets directory
    location ~ ^/assets/.*\.php$ {
        deny all;
    }

    location ~ \.php$ {
保存文件并重新启动Nginx以使最近的更改生效。
# systemctl restart nginx
推荐的Apache配置
在Apache的httpd.conf文件或虚拟主机配置中使用以下配置:
# Set document root to be "testapp/web"
DocumentRoot "/var/www/html/testapp/web"

<Directory "/var/www/html/testapp/web">
    # use mod_rewrite for pretty URL support
    RewriteEngine on

    # if $showScriptName is false in UrlManager, do not allow accessing URLs with script name
    RewriteRule ^index.php/ - [L,R=404]

    # If a directory or a file exists, use the request directly
    RewriteCond %{REQUEST_FILENAME} !-f
    RewriteCond %{REQUEST_FILENAME} !-d

    # Otherwise forward the request to index.php
    RewriteRule . index.php

    # ...other settings...
</Directory>
保存文件并重新启动Apache以使最近的更改生效。
# systemctl restart httpd
通过浏览器测试Yii Web应用程序
在测试的Yii web应用程序之前,确保/web/assets/通过运行以下命令更新目录的安全上下文,使其对web进程可写:
# chcon -R -t httpd_sys_content_rw_t '/usr/share/nginx/html/testapp/web/assets/'    [对于Nginx服务器]
# chcon -R -t httpd_sys_content_rw_t '/var/www/html/testapp/web/assets/'     [对于Apache服务器]
接下来,更新firewalld规则以允许HTTP和HTTPS请求通过防火墙到达Nginx服务器。
# firewall-cmd --zone=public --add-service=http --permanent
# firewall-cmd --zone=public --add-service=https --permanent
# firewall-cmd --reload
http://tecmintapp.lan
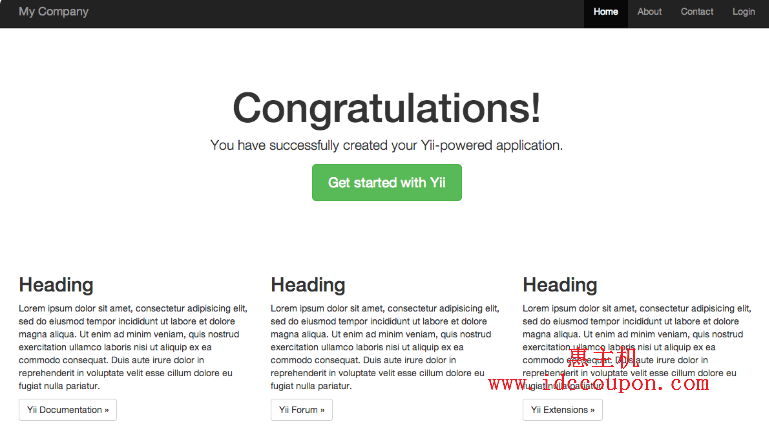
默认的Yii应用程序网页应如以下屏幕截图所示显示。

出现以上界面,那么恭喜你已经成功安装了最新一代的Yii PHP框架并将其配置为与RHEL系统上的Nginx或Apache一起工作。
总结
众所周知,Yii是一个快速、安全、高效的PHP框架,其Web 2.0甚至具备应用开发所需要的几乎一切功能,它是最有效率的PHP框架之一。
如果需要在CentOS、Rocky Linux、AlmaLinux系统中安装Yii PHP框架的话,那么完全可以参考上述教程进行安装,相对来说比较简单,适合新用户上手。