Nagios是一个很棒的开源监控工具,它提供了一个更全面的监控环境,可以始终监控所有服务器/网络, 无论是在数据中心还是在小型实验室均可以使用。
使用Nagios还可以在单个窗口中远程监控远程主机及其服务,它显示警告并指示服务器是否出现问题,最终帮助我们在问题发生之前检测到它们,从而减少停机时间和业务损失。
目前Nagios已于2022年10月4日发布了最新版本Nagios Core 4.4.9,以及最新稳定版本的Nagios plugins 2.3.3 。
在本文中,小编将简单介绍在RHEL和基于RHEL的发行版(例如CentOS Stream、Rocky Linux、AlmaLinux和Fedora)上从源代码 (tarball)安装和配置最新版本的Nagios Core的简单过程。
一帮情况下,在30分钟内就可以完成安装,这里没有高级安装程序,只有基本安装,可以在当今大多数Linux服务器上100%运行。请注意:本文安装说明是基于RHEL 9.0 Linux发行版编写的。
在Linux中安装Nagios Core和Nagios Plugin,如果正确地按照以下说明进行操作,将得到以下信息:
- Nagios及其插件将安装在/usr/local/nagios目录下。
- Nagios将被配置为监控本地机器的一些服务(磁盘使用率、CPU 负载、当前用户、总进程等)。
- Nagios Web界面将在http://localhost/nagios可用。
第1步:安装Apache和PHP包
在使用源代码安装Nagios之前,需要安装Apache、PHP和一些库,如gcc、glibc、glibc-common和GD库及其开发库。为此,可以使用yum包安装程序,命令如下:
# yum install -y httpd httpd-tools php gcc glibc glibc-common gd gd-devel make net-snmp
第2步:创建Nagios用户和组
使用useradd命令和nagcmd组帐户创建一个新的nagios用户并设置密码。
[root@tecmint]# useradd nagios
[root@tecmint]# groupadd nagcmd
接下来,使用usermod命令将nagios用户和apache用户添加到nagcmd组,具体如下:
[root@tecmint]# usermod -G nagcmd nagios
[root@tecmint]# usermod -G nagcmd apache
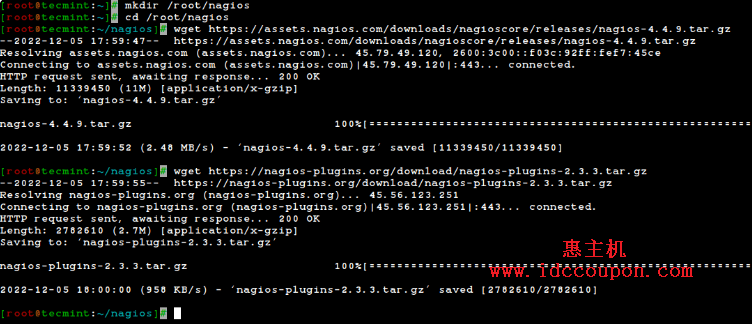
第3步:下载Nagios Core和Nagios Plugin
为Nagios安装及其所有以后的下载内容创建一个目录。
[root@tecmint]# mkdir /root/nagios
[root@tecmint]# cd /root/nagios
现在使用wget命令下载最新Nagios Core和Nagios Plugins包。
# wget https://assets.nagios.com/downloads/nagioscore/releases/nagios-4.4.9.tar.gz
# wget https://nagios-plugins.org/download/nagios-plugins-2.3.3.tar.gz
第4步:提取Nagios Core和Nagios插件
这里需要使用tar命令提取下载的包,具体如下:
# tar -xf nagios-4.4.9.tar.gz
# tar -xf nagios-plugins-2.3.3.tar.gz
当提取这些tarball时,该目录中将出现两个新文件夹。
# ls -l

total 13804
drwxrwxr-x 21 root root     4096 Nov 17 02:22 nagios-4.4.9
-rw-r--r--  1 root root 11339450 Nov 17 03:08 nagios-4.4.9.tar.gz
drwxr-xr-x 15 root root     4096 Mar 11  2020 nagios-plugins-2.3.3
-rw-r--r--  1 root root  2782610 Mar 11  2020 nagios-plugins-2.3.3.tar.gz
第5步:安装和配置Nagios Core
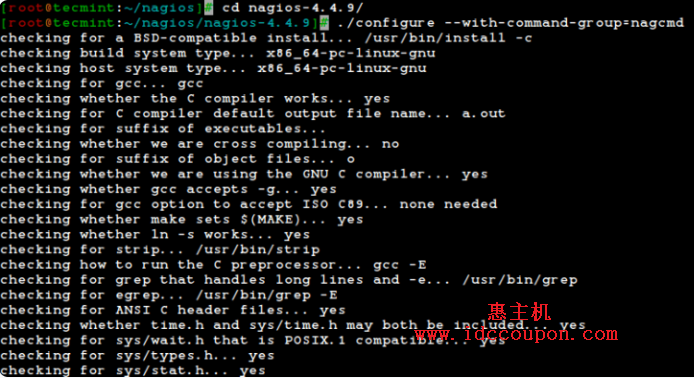
现在将配置Nagios Core,为此需要转到Nagios目录并运行配置文件,如果一切正常,它将最终显示输出作为示例输出。
# cd nagios-4.4.9/
# ./configure --with-command-group=nagcmd
Nagios Core的配置摘要如下:
Creating sample config files in sample-config/ ...


*** Configuration summary for nagios 4.4.9 2022-12-16 ***:

 General Options:
 -------------------------
        Nagios executable:  nagios
        Nagios user/group:  nagios,nagios
       Command user/group:  nagios,nagcmd
             Event Broker:  yes
        Install ${prefix}:  /usr/local/nagios
    Install ${includedir}:  /usr/local/nagios/include/nagios
                Lock file:  /run/nagios.lock
   Check the result directory:  /usr/local/nagios/var/spool/checkresults
           Init directory:  /lib/systemd/system
  Apache conf.d directory:  /etc/httpd/conf.d
             Mail program:  /usr/bin/mail
                  Host OS:  linux-gnu
          IOBroker Method:  epoll

 Web Interface Options:
 ------------------------
                 HTML URL:  http://localhost/nagios/
                  CGI URL:  http://localhost/nagios/cgi-bin/
 Traceroute (used by WAP):

Review the options above for accuracy.  If they look okay,
type 'make all' to compile the main program and CGIs.
配置后,需要使用make all和make install命令编译和安装所有二进制文件,它将在机器上安装所有需要的库,以便可以继续进行下一步骤:
# make all
# make install
*** Main program, CGIs and HTML files installed ***

You can continue with installing Nagios as follows (type 'make'
without any arguments for a list of all possible options):

  make install-init
     - This installs the init script in /lib/systemd/system

  make install-commandmode
     - This installs and configures permissions on the
       directory for holding the external command file

  make install-config
     - This installs sample config files in /usr/local/nagios/etc

make[1]: Leaving directory '/root/nagios/nagios-4.4.9'
以下命令将为Nagios安装初始化脚本。
# make install-init
为了使Nagios从命令行工作,需要安装command-mode。
# make install-commandmode
接下来,安装示例Nagios文件,请运行以下命令:
# make install-config
/usr/bin/install -c -m 775 -o nagios -g nagios -d /usr/local/nagios/etc
/usr/bin/install -c -m 775 -o nagios -g nagios -d /usr/local/nagios/etc/objects
/usr/bin/install -c -b -m 664 -o nagios -g nagios sample-config/nagios.cfg /usr/local/nagios/etc/nagios.cfg
/usr/bin/install -c -b -m 664 -o nagios -g nagios sample-config/cgi.cfg /usr/local/nagios/etc/cgi.cfg
/usr/bin/install -c -b -m 660 -o nagios -g nagios sample-config/resource.cfg /usr/local/nagios/etc/resource.cfg
/usr/bin/install -c -b -m 664 -o nagios -g nagios sample-config/template-object/templates.cfg /usr/local/nagios/etc/objects/templates.cfg
/usr/bin/install -c -b -m 664 -o nagios -g nagios sample-config/template-object/commands.cfg /usr/local/nagios/etc/objects/commands.cfg
/usr/bin/install -c -b -m 664 -o nagios -g nagios sample-config/template-object/contacts.cfg /usr/local/nagios/etc/objects/contacts.cfg
/usr/bin/install -c -b -m 664 -o nagios -g nagios sample-config/template-object/timeperiods.cfg /usr/local/nagios/etc/objects/timeperiods.cfg
/usr/bin/install -c -b -m 664 -o nagios -g nagios sample-config/template-object/localhost.cfg /usr/local/nagios/etc/objects/localhost.cfg
/usr/bin/install -c -b -m 664 -o nagios -g nagios sample-config/template-object/windows.cfg /usr/local/nagios/etc/objects/windows.cfg
/usr/bin/install -c -b -m 664 -o nagios -g nagios sample-config/template-object/printer.cfg /usr/local/nagios/etc/objects/printer.cfg
/usr/bin/install -c -b -m 664 -o nagios -g nagios sample-config/template-object/switch.cfg /usr/local/nagios/etc/objects/switch.cfg

*** Config files installed ***

Remember, these are *SAMPLE* config files.  You'll need to read
the documentation for more information on how to actually define
services, hosts, etc. to fit your particular needs.
第6步:自定义Nagios配置
使用适当的编辑器打开“ contacts.cfg ”文件,并将与nagiosadmin联系人定义关联的电子邮件地址设置为接收电子邮件警报。
# vi /usr/local/nagios/etc/objects/contacts.cfg
###############################################################################
#
# CONTACTS
#
###############################################################################

# Just one contact defined by default - the Nagios admin (that's you)
# This contact definition inherits a lot of default values from the
# 'generic-contact' template which is defined elsewhere.

define contact {

    contact_name            nagiosadmin             ; Short name of user
    use                     generic-contact         ; Inherit default values from generic-contact template (defined above)
    alias                   Nagios Admin            ; Full name of user
    email                   admin@idccoupon.com ; <<***** 将此更改为你的邮件地址 ******
}
第7步:安装和配置Nagios的Web界面
到这里已经完成了后端的所有配置,现在将使用以下命令配置Nagios的Web界面。下面的命令将为Nagios配置Web界面,并创建一个Web管理员用户“ nagiosadmin ”。
# make install-webconf

接下来将为“ nagiosadmin ”创建一个密码。执行此命令后,请输入两次密码并记住它,因为之后你登录Nagios Web界面时会用到此密码。
# htpasswd -s -c /usr/local/nagios/etc/htpasswd.users nagiosadmin
New password:
Re-type new password:
Adding password for user nagiosadmin
重新启动Apache以使新设置生效。
# systemctl restart httpd
第八步:编译安装Nagios插件
可以按照下面的指示配置和安装它。
# cd /root/nagios
# cd nagios-plugins-2.3.3
# ./configure --with-nagios-user=nagios --with-nagios-group=nagios
# make
# make install
第9步:验证Nagios配置文件
现在都完成了Nagios配置,是时候验证它了,请输入以下命令。如果一切顺利,它将显示类似于以下输出。
# /usr/local/nagios/bin/nagios -v /usr/local/nagios/etc/nagios.cfg
Nagios Core 4.4.9
Copyright (c) 2009-present Nagios Core Development Team and Community Contributors
Copyright (c) 1999-2009 Ethan Galstad
Last Modified: 2022-12-16
License: GPL

Website: https://www.nagios.org
Reading configuration data...
   Read main config file okay...
   Read object config files okay...

Running pre-flight check on configuration data...

Checking objects...
	Checked 8 services.
	Checked 1 hosts.
	Checked 1 host groups.
	Checked 0 service groups.
	Checked 1 contacts.
	Checked 1 contact groups.
	Checked 24 commands.
	Checked 5 time periods.
	Checked 0 host escalations.
	Checked 0 service escalations.
Checking for circular paths...
	Checked 1 hosts
	Checked 0 service dependencies
	Checked 0 host dependencies
	Checked 5 timeperiods
Checking global event handlers...
Checking obsessive compulsive processor commands...
Checking misc settings...

Total Warnings: 0
Total Errors:   0

Things look okay - No serious problems were detected during the pre-flight check
第10步:将Nagios服务添加到系统启动
为了使Nagios在重新启动后工作,现在需要在系统启动时使用systemctl命令启用nagios和httpd。
# systemctl enable nagios
# systemctl enable httpd
接下来,重新启动Nagios以使新设置生效。
# systemctl restart nagios
第11步:在防火墙中允许Nagios Web
要访问Nagios Web界面,需要通过运行以下命令打开Apache端口:
# firewall-cmd --permanent --zone=public --add-service=http
# firewall-cmd --permanent --zone=public --add-service=https
# firewall-cmd --reload
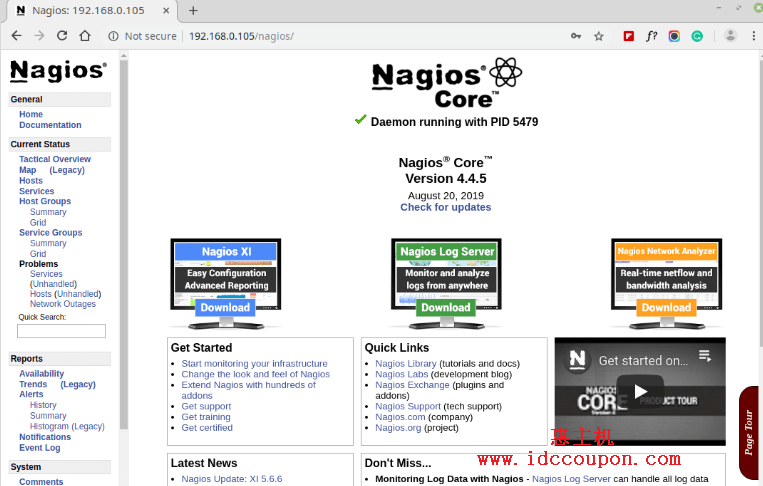
第12步:登录到Nagios Web界面
Nagios已准备就绪,现在使用“ http://Your-server-IP-address/nagios ”或“ http://FQDN/nagios ”在浏览器中打开它并提供用户名“ nagiosadmin ”和密码进行登录。
Nagios后台仪表板如下:
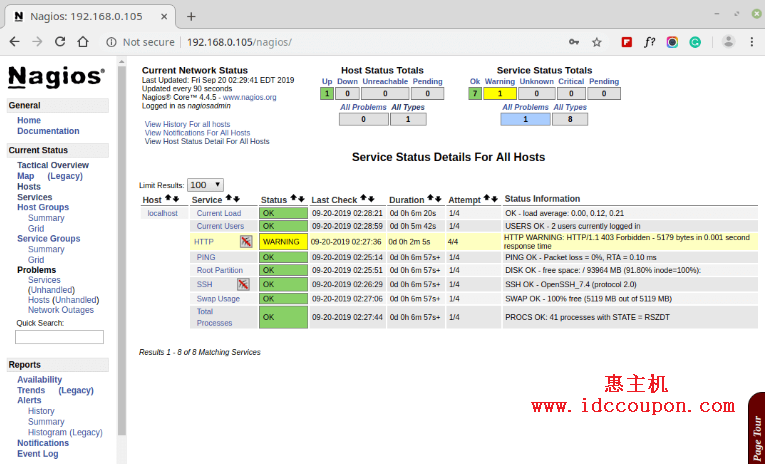
服务视图如下所示:
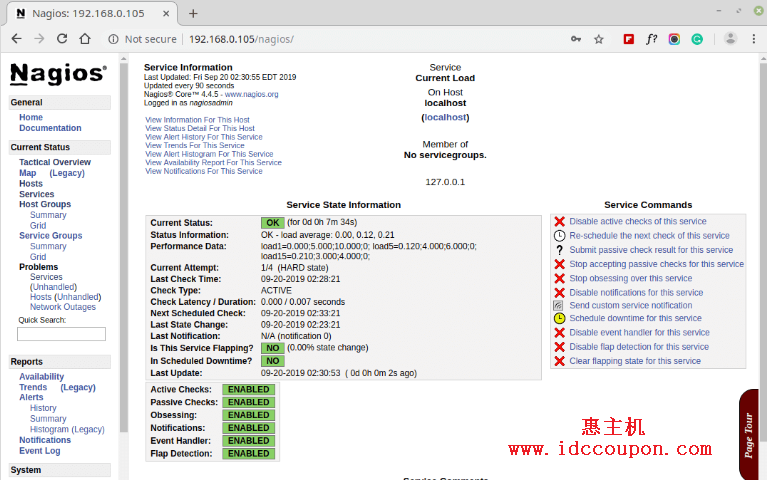
过程视图如下所示:
恭喜!到这里已经成功安装并配置了Nagios及其插件,赶快使用它去监控服务器吧。
附:将Nagios 3.x升级到Nagios Core 4.x
如果你已经在运行旧版本的Nagios,则可以随时升级它。为此,只需下载最新的nagios源代码tar存档并按如下所示进行配置。
# systemctl stop nagios
# wget https://assets.nagios.com/downloads/nagioscore/releases/nagios-4.4.9.tar.gz
# tar -zxvf nagios-4.4.9.tar.gz
# cd nagios-4.4.9
# ./configure
# make all
# make install
# systemctl start nagios
结论
在以上设置过程中,小编简单介绍了如何将Linux、Windows、打印机、交换机和设备添加到Nagios监控服务器。通过以上过程设置,可以更好的监控你的设备,为设备稳定运行添加一层保障。